Reading the Heat: How to Understand Thermal Images in Building Inspections
How to read a thermal imaging report: moisture ingress, insulation defects, air leaks, and why a cold spot isn't always a leak. A practical guide for New Zealand property owners.
By Art Ryumin6 min readNew Zealand
- inside/outside difference needed
- ≥10 °C
- inside/outside difference needed
- monolithic-clad homes most at risk
- 1988–2004
- monolithic-clad homes most at risk
- highest-risk areas to check
- 4
- highest-risk areas to check
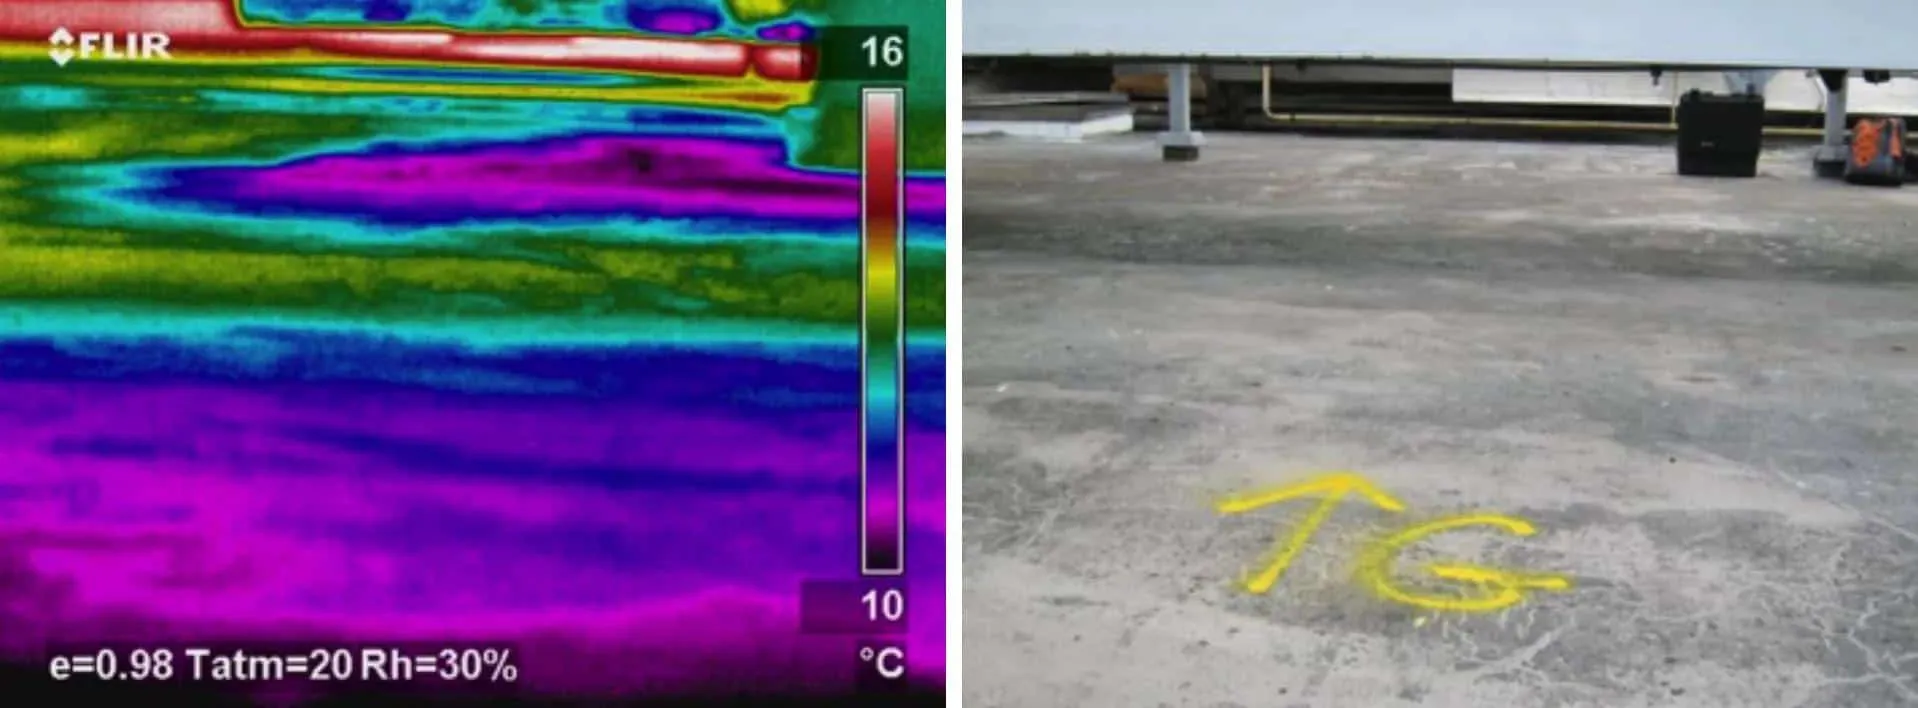
If you've received a thermal imaging report, you're probably looking at a series of colourful images (blues, purples, oranges and yellows) that resemble a heat map. These are called thermograms, and they reveal temperature differences across your building.
We use drone-mounted thermal cameras and professional handheld systems to inspect roofs, walls and ceilings, detecting issues that are invisible to a standard visual inspection. This guide will help you:
- Understand what thermal images actually show
- Recognise normal vs abnormal patterns
- Identify common signs of moisture, insulation failure and air leaks
- Better interpret your inspection report
Timing is everything: why hot and cold spots both matter
Context is everything. An infrared camera doesn't "see" water. It detects surface temperature differences. Whether moisture appears as a hot or cold spot depends on the time of day and the conditions during the inspection.
Morning or winter inspections (heating season)
When the inside is heated and the outside is cold, moisture typically appears as dark, cool patches. This is evaporative cooling: as moisture evaporates from a wet surface it draws heat away, making that area cooler than the dry material around it.
Evening or post-sunset inspections (cooling season)
After a warm day the building cools down. Water has high thermal mass and holds heat much longer than dry timber or plaster, so trapped moisture appears as bright, warm patches against the cooling background. This is why we always survey flat roofs just after sunset.
The basics: how thermal imaging works
Thermal cameras detect surface temperature differences and display them with a colour palette:
- Warm areas = lighter colours (yellow, orange, white)
- Cool areas = darker colours (blue, purple, black)
Two physical processes make building defects visible:
- Evaporative cooling: moisture absorbs heat as it evaporates, so affected areas look cooler.
- Thermal mass (capacitance): wet materials retain heat longer, so after sunset they stay warmer while dry areas cool quickly.
The baseline: what a healthy building looks like
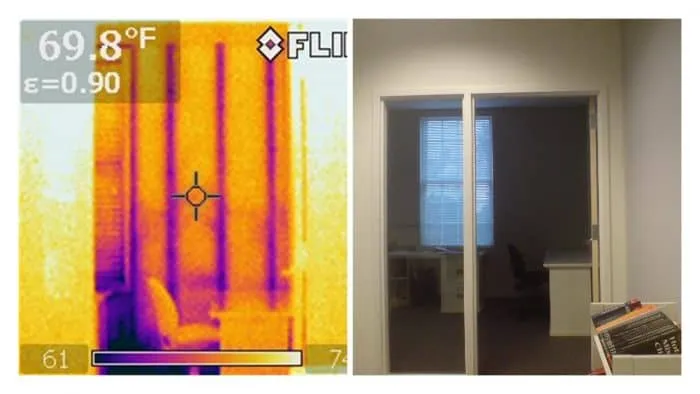
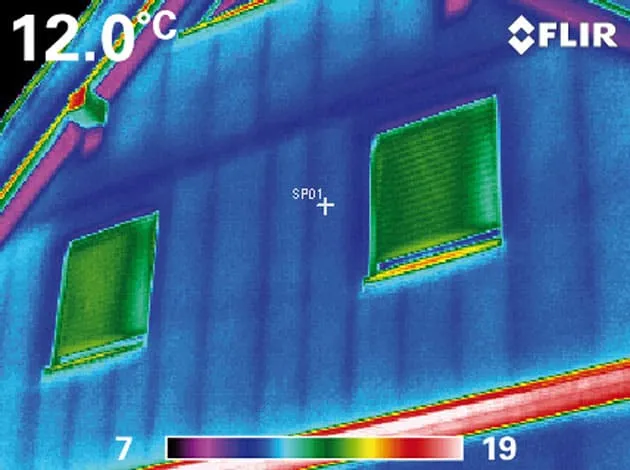
A well-insulated wall typically shows regular vertical lines (timber framing), even temperatures between studs, and consistent patterns across the wall.
Moisture ingress: the most important issue to detect
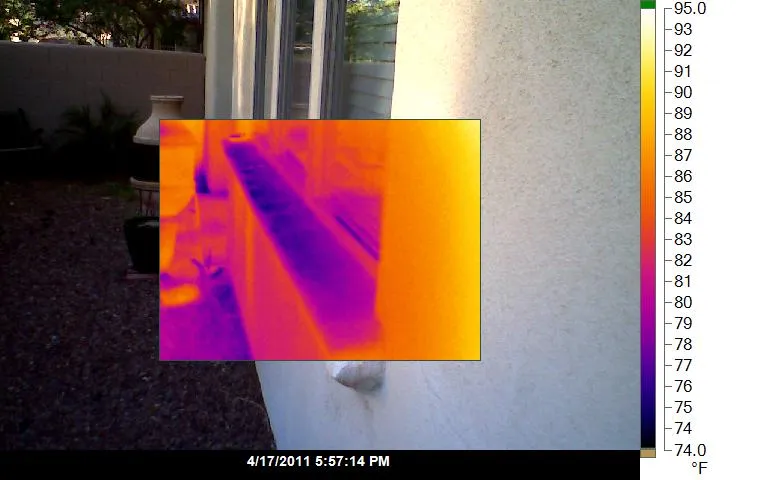
Moisture appears as irregular, patchy cool areas with shapes that don't follow framing lines, often concentrated around junctions.
Window and door junctions
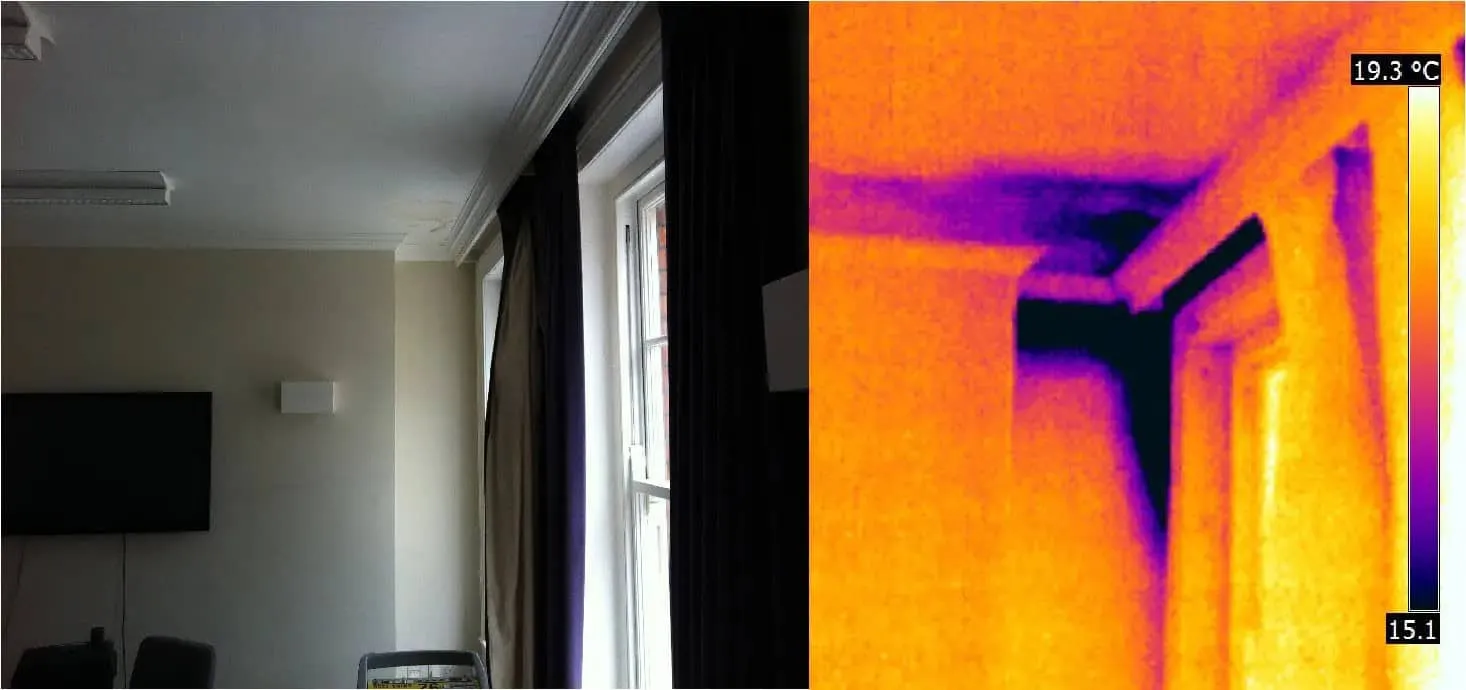
The most common failure points. The typical pattern is a triangular or fan-shaped cool zone starting at the window corner and spreading downward.
Roofline and flashing failures
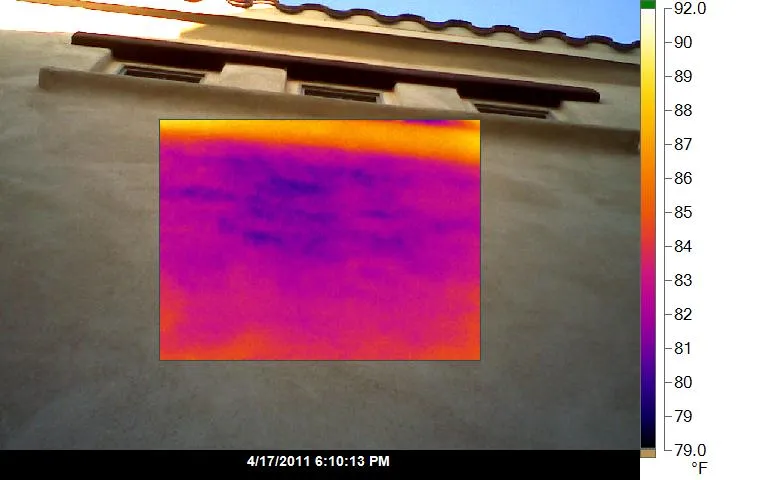
These show as broad, mottled cool areas below the roofline.
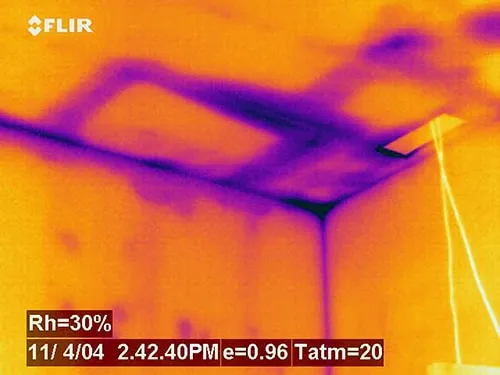
Ceiling and roof moisture
Ceiling moisture appears as irregular cool patches, often before any visible staining.
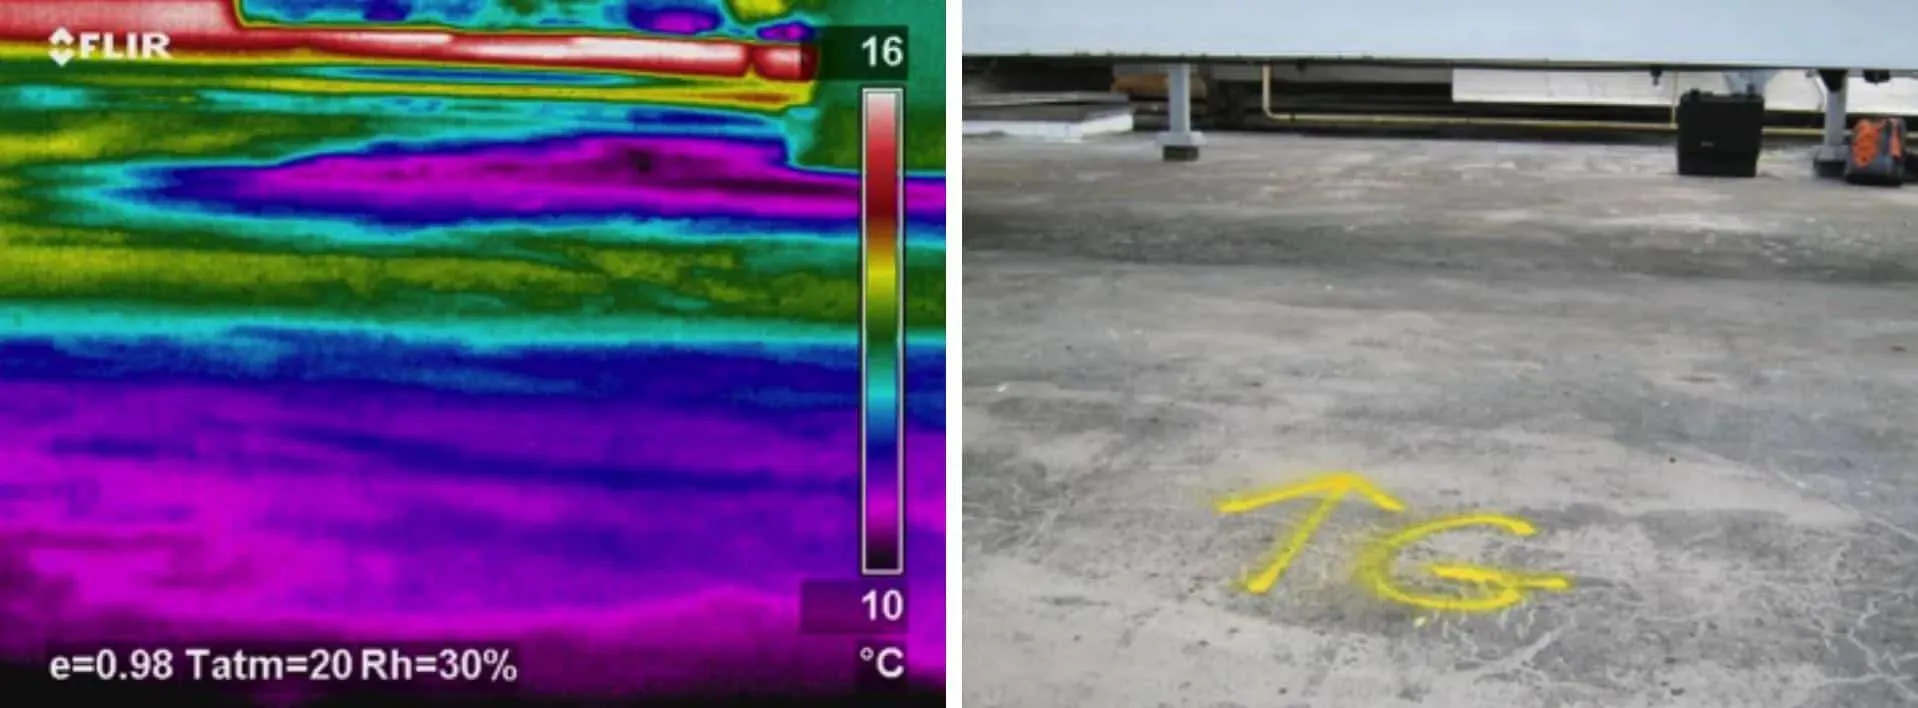
Flat roofs: post-sunset surveys
For flat or low-pitch membrane roofs, we survey just after sunset. During the day the whole roof absorbs solar radiation. After sunset, dry insulation cools rapidly while saturated insulation retains heat, so wet areas appear as distinct warm patches. That's the opposite of what you see on walls in a morning inspection.
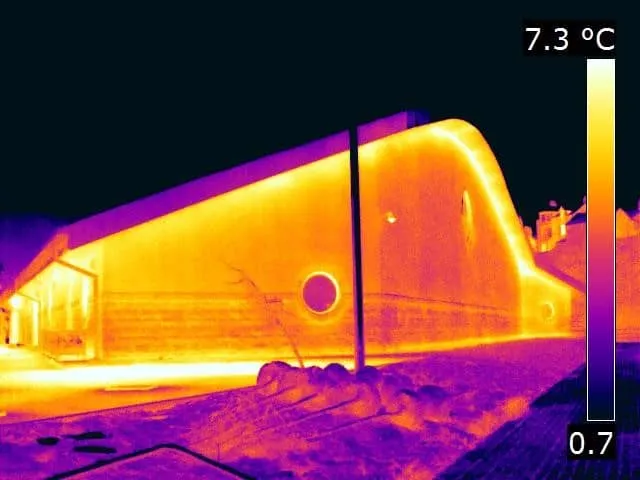
Air infiltration
Air leaks create wispy, streak-like cool patterns, typically at floor junctions and around doors.
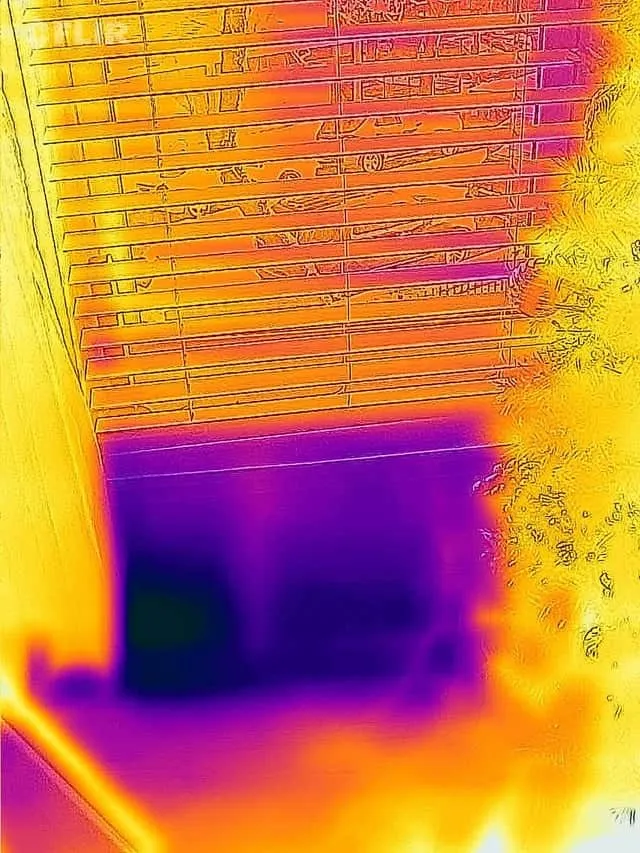
Insulation defects
Missing or slumped insulation appears as large, uniform rectangular cold zones between studs.
Quick reference guide
| What you see | What it likely means | Verdict | Time of day |
|---|---|---|---|
| Regular repeating vertical lines | Normal timber framing (thermal bridging) | ✅ Normal | Any time |
| Warm windows | Lower insulation value, as expected | ✅ Normal | Any time |
| Irregular, patchy cool areas on walls | Possible moisture ingress | ⚠️ Investigate | Morning / heating season |
| Irregular, patchy warm areas on walls | Possible moisture ingress (retained heat) | ⚠️ Investigate | Evening / after sunset |
| Triangular or fan-shaped cool zone at window corner | Water leaking from window junction | ⚠️ Investigate | Morning / heating season |
| Broad mottled cool area below roofline | Flashing or roof-to-wall leak | ⚠️ Investigate | Morning / heating season |
| Irregular cool patch on ceiling | Roof or plumbing leak above ceiling | ⚠️ Investigate | Morning / heating season |
| Warm patch on flat roof after sunset | Moisture trapped in roof insulation | ⚠️ Investigate | Evening / post-sunset |
| Large uniform rectangle between studs | Missing or damaged insulation | ⚠️ Investigate | Any time (clearer in winter) |
| Wispy streak-like cool pattern at floor/door | Air infiltration (draught) | ⚠️ Investigate | Heating season |
New Zealand context: monolithic cladding homes
For homes built between 1988 and 2004 with monolithic cladding (direct-fixed stucco, fibre cement sheet and polystyrene-based EIFS), thermal imaging is one of the most valuable diagnostic tools available. These systems lack a drainage cavity, so any water that gets past the exterior face is trapped against the timber framing.
Because the damage is hidden behind the cladding, it can go undetected for years. By the time cracking, staining or soft spots appear, significant structural damage may already be present. The four highest-risk areas we focus on:
- Window and door junctions. Sealant failures are the most common entry point, showing as a triangular cool zone spreading down from the corner.
- Roof-to-wall flashing. Failures show as broad, mottled cool areas below the roofline.
- Penetrations. Pipes, meter boxes and vents that interrupt the cladding face.
- Base of the wall. Moisture that has tracked down pools here, and rising damp can wick upward.
FAQ
What does a thermal image show in a building inspection?
Surface temperature differences. These can indicate moisture, insulation issues or air leaks, but they don't confirm defects without further testing.
Can thermal imaging detect water leaks?
It identifies temperature patterns consistent with moisture. Confirmation requires a moisture meter.
Why do windows appear warm in thermal images?
Windows have lower insulation values than walls, so they often appear warmer. That's normal.
When is the best time to do a thermal inspection?
You need a temperature difference of at least 10 °C between inside and outside. In New Zealand that's most reliable in winter, or early morning and evening in the shoulder seasons.
- Interior walls and ceilings: early morning, after the building has been heated overnight.
- Exterior walls: late afternoon to evening, as the sun-warmed cladding starts to cool.
- Flat roofs: just after sunset, when saturated insulation holds its heat.
Before an interior inspection, pull back curtains and blinds the night before so wall corners and window reveals show accurate readings.